Customer Interaction
Contact Portfolios
Portfolios are groupings of contacts that allow you to segment, organize, and automatically assign contacts to specific agents or teams. This functionality streamlines database management, optimizes conversation distribution, and improves service efficiency.
Key Features
- Unique assignment: each contact can belong to only one portfolio.
- No limits: there is no restriction on the number of portfolios or the number of contacts each can contain.
- Role-based management:
- Administrators: manage all portfolios in the account.
- Agents: can only manage and view the portfolios assigned to them.
Use Cases
- Segmentation: classify contacts by criteria such as region, customer type, or service level.
- Automatic assignment: route incoming conversations directly to designated agents.
- Team management: distribute groups of contacts among different teams or areas.
- Load distribution: enable supervision, balancing, and report generation by agent or portfolio.
Assign Contacts to a Portfolio
Option 1: From the main contact list
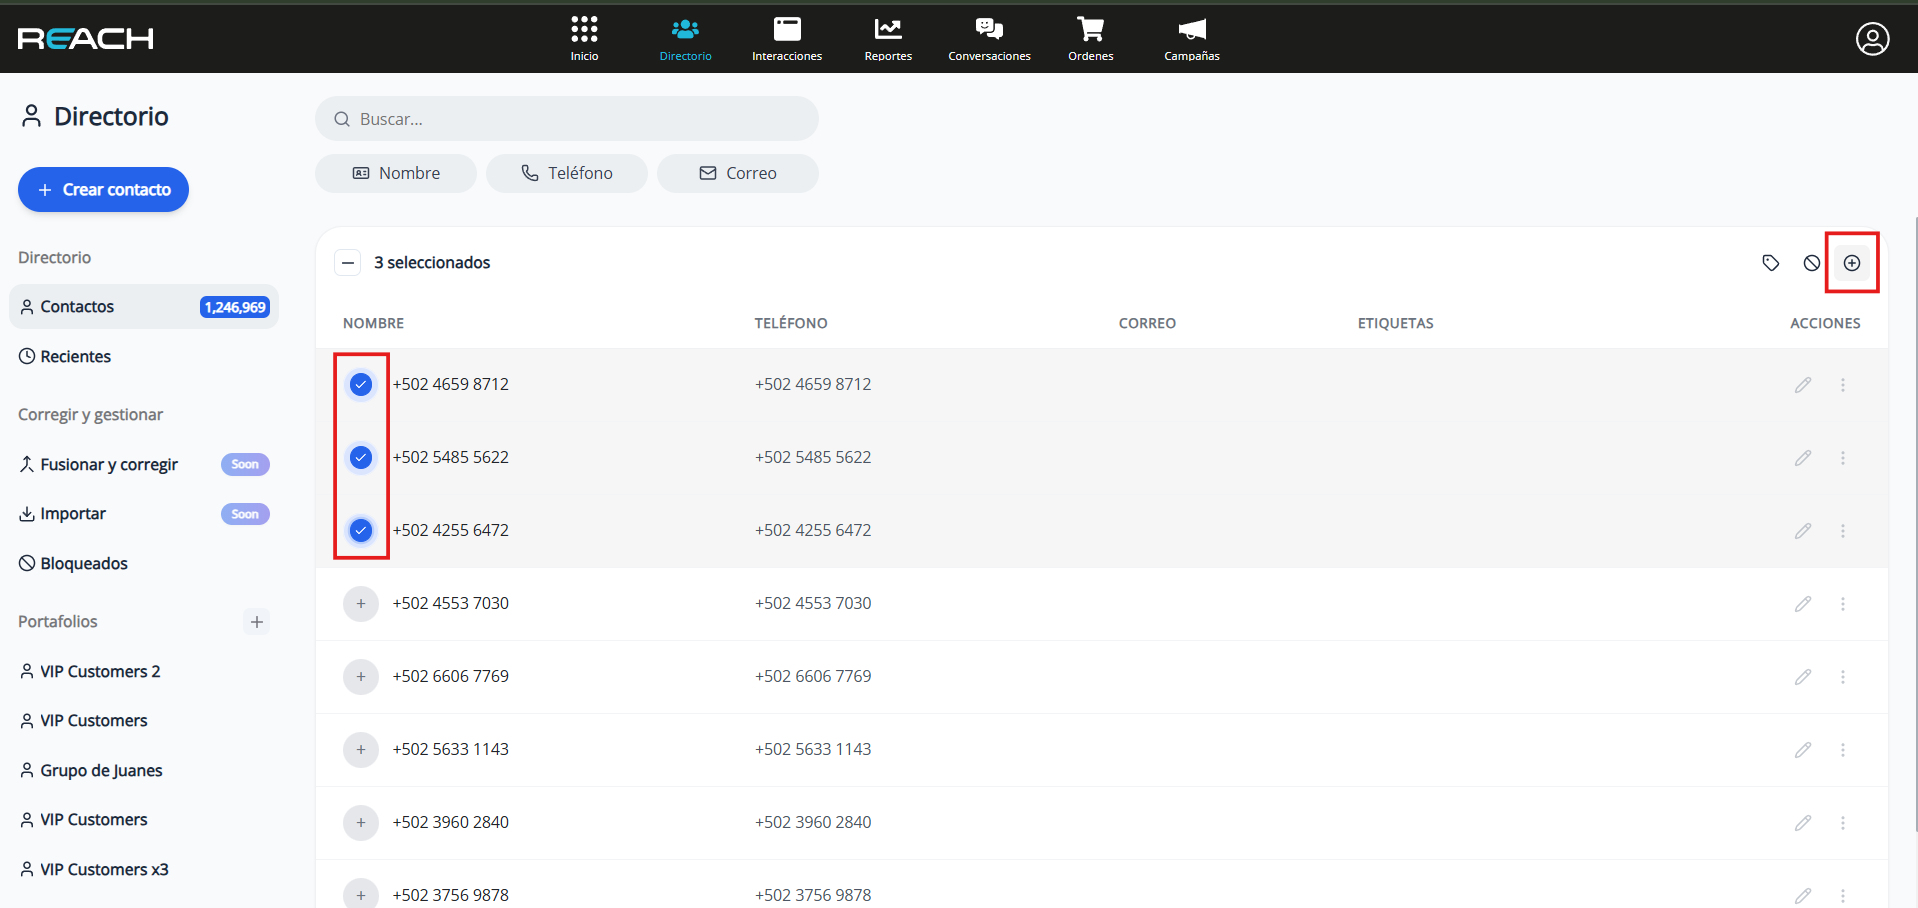
- Select one or more contacts using the checkboxes.
- Click the “+” (Add) button on the toolbar.
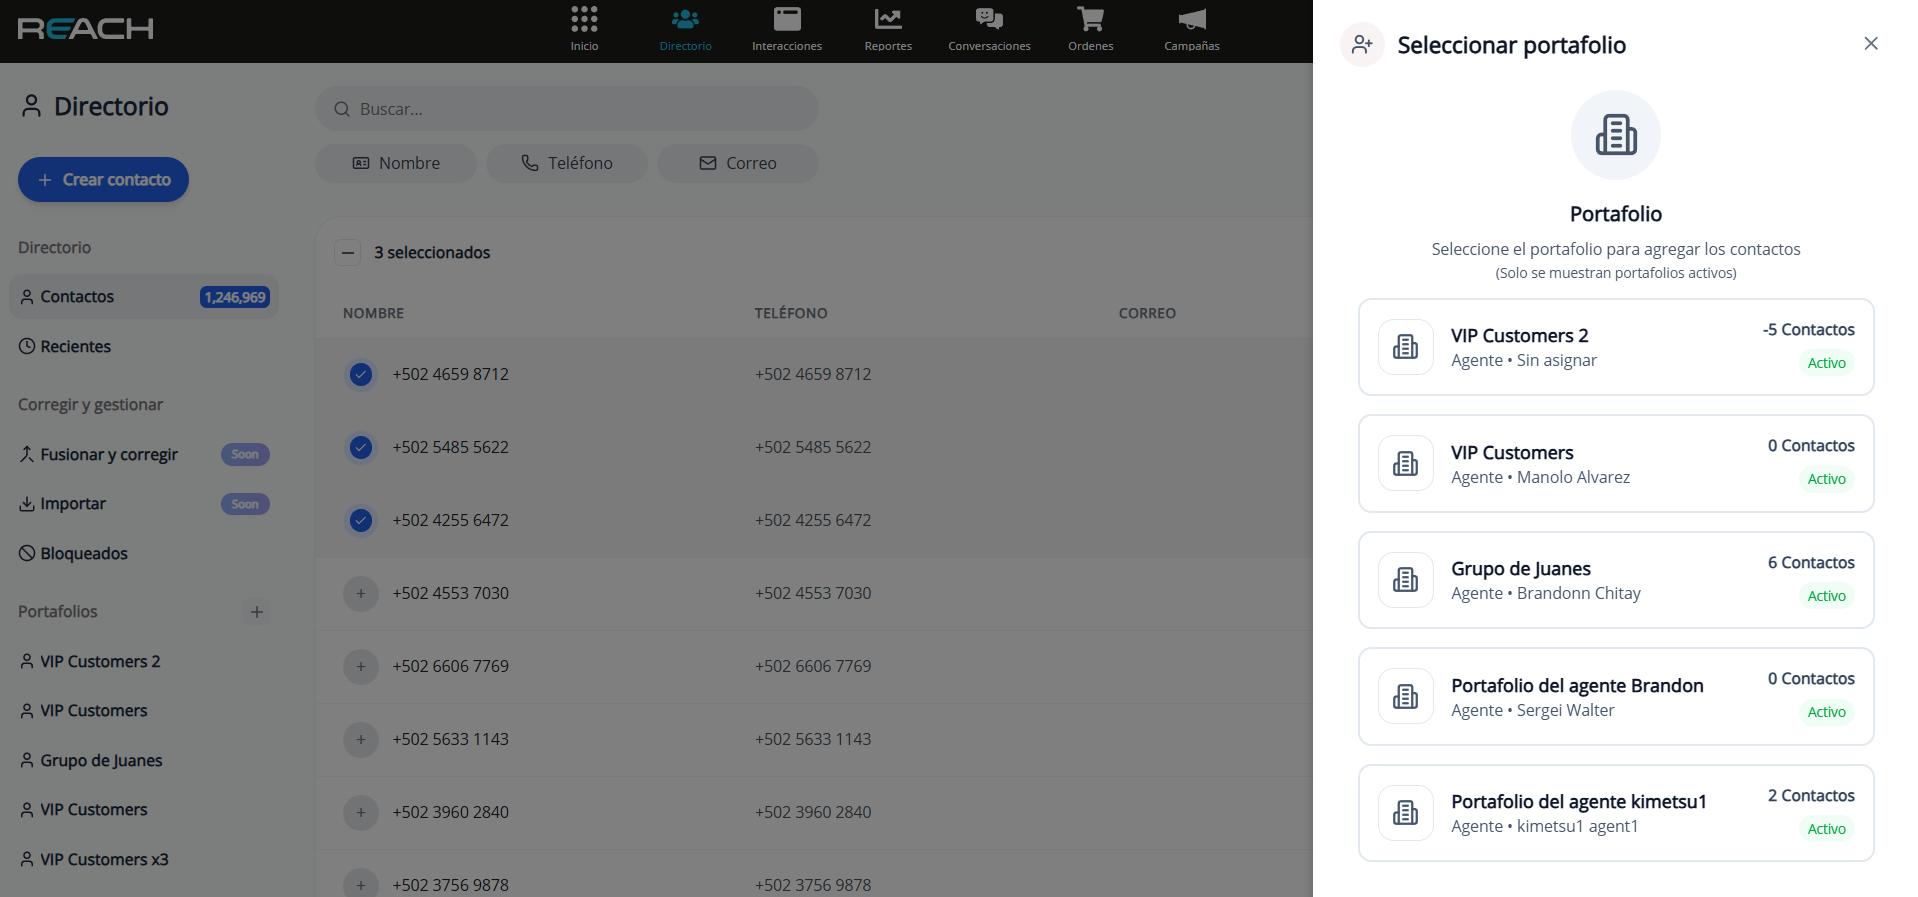
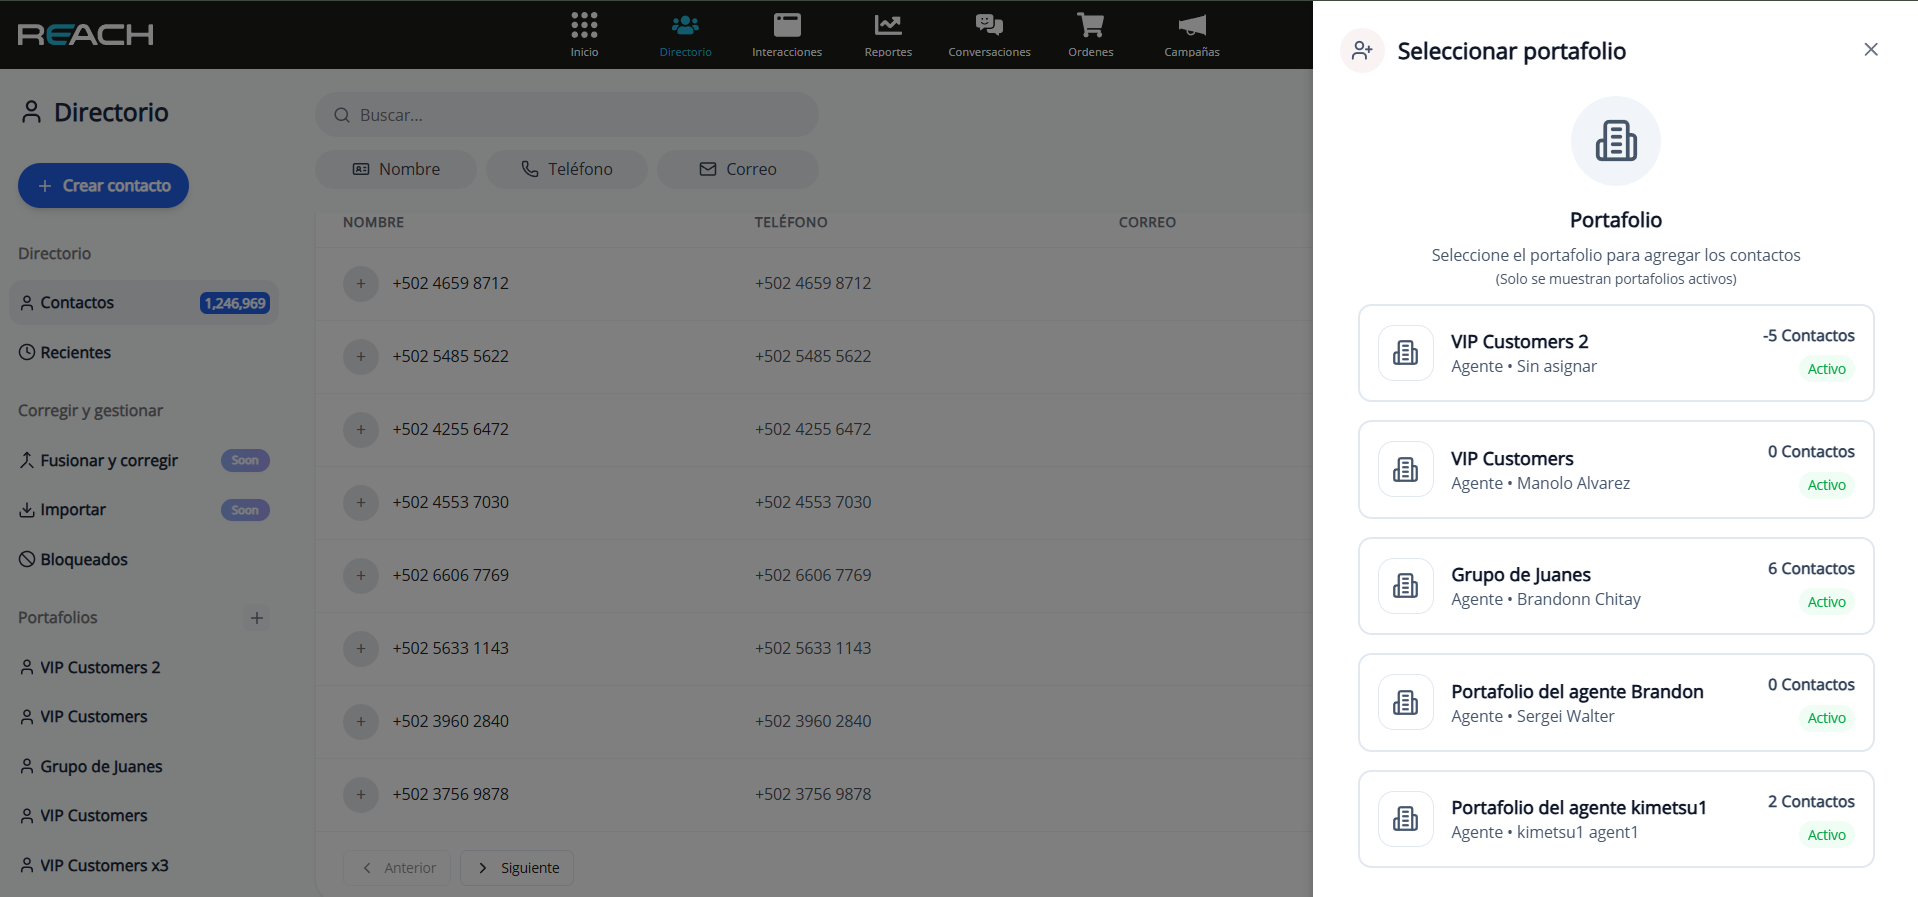
- Choose the destination portfolio.
- Review the information and confirm the assignment.
Option 2: From an individual contact
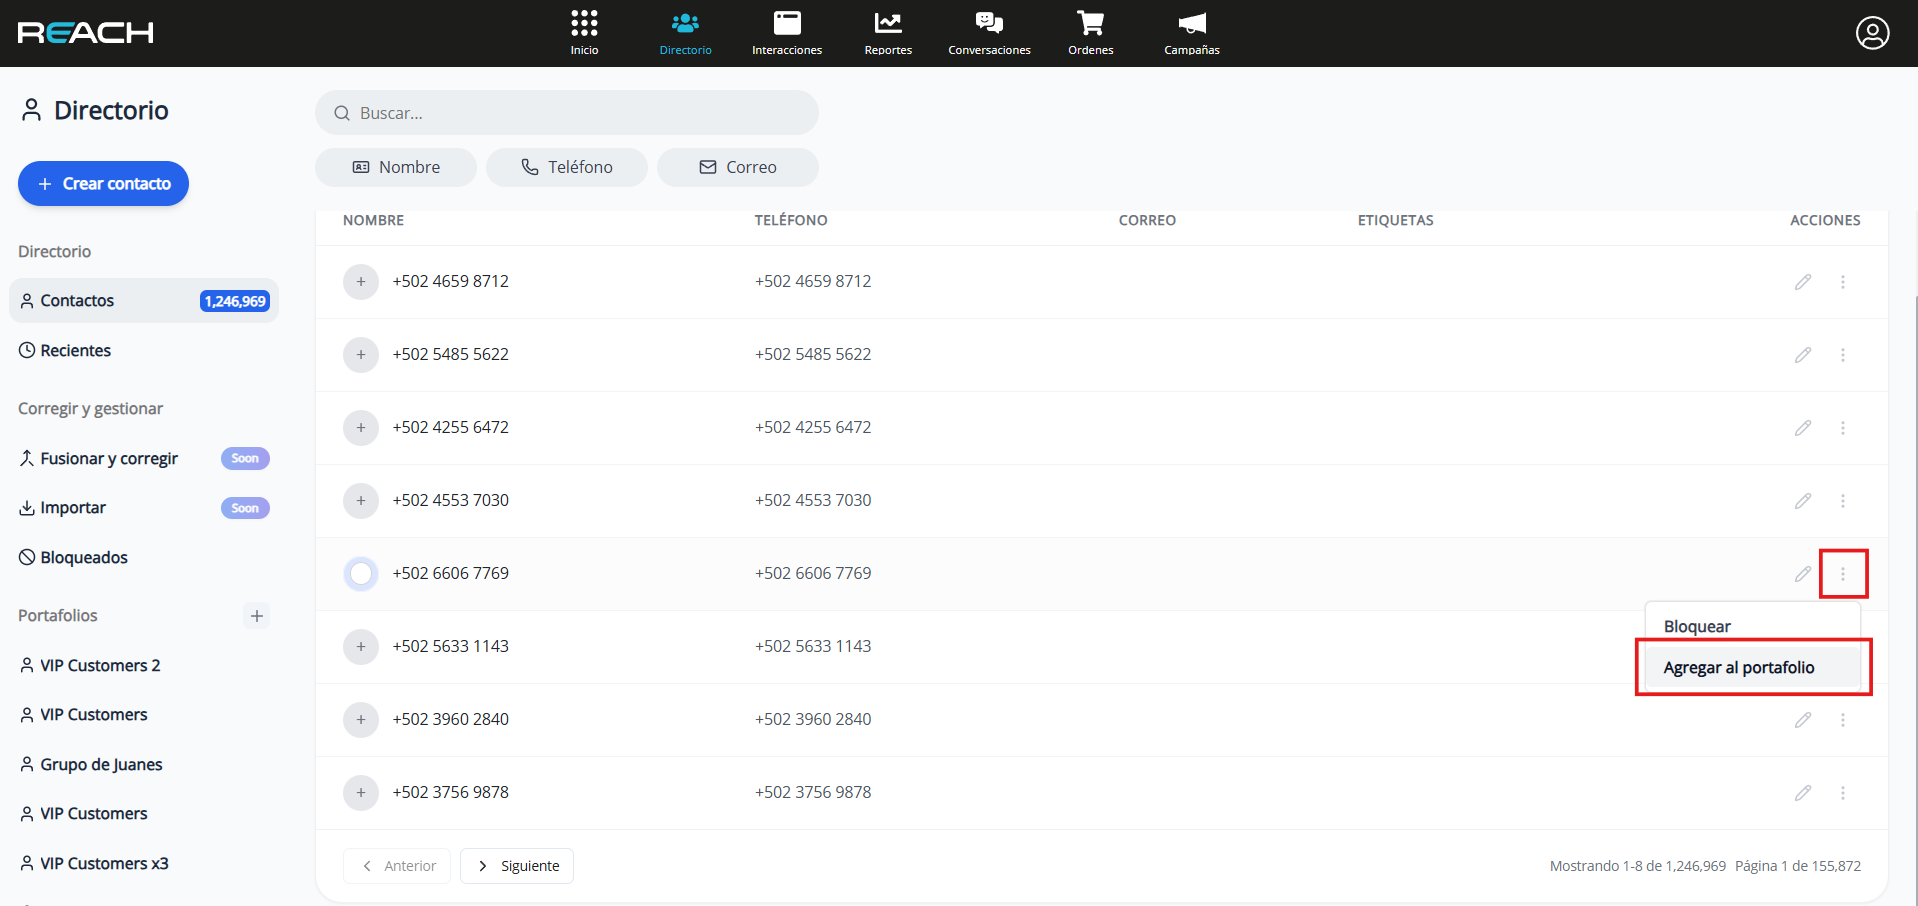
- Click the options menu (⋮) next to the contact.
- Select “Add to portfolio”.
- Choose the destination portfolio.
- Confirm the assignment.
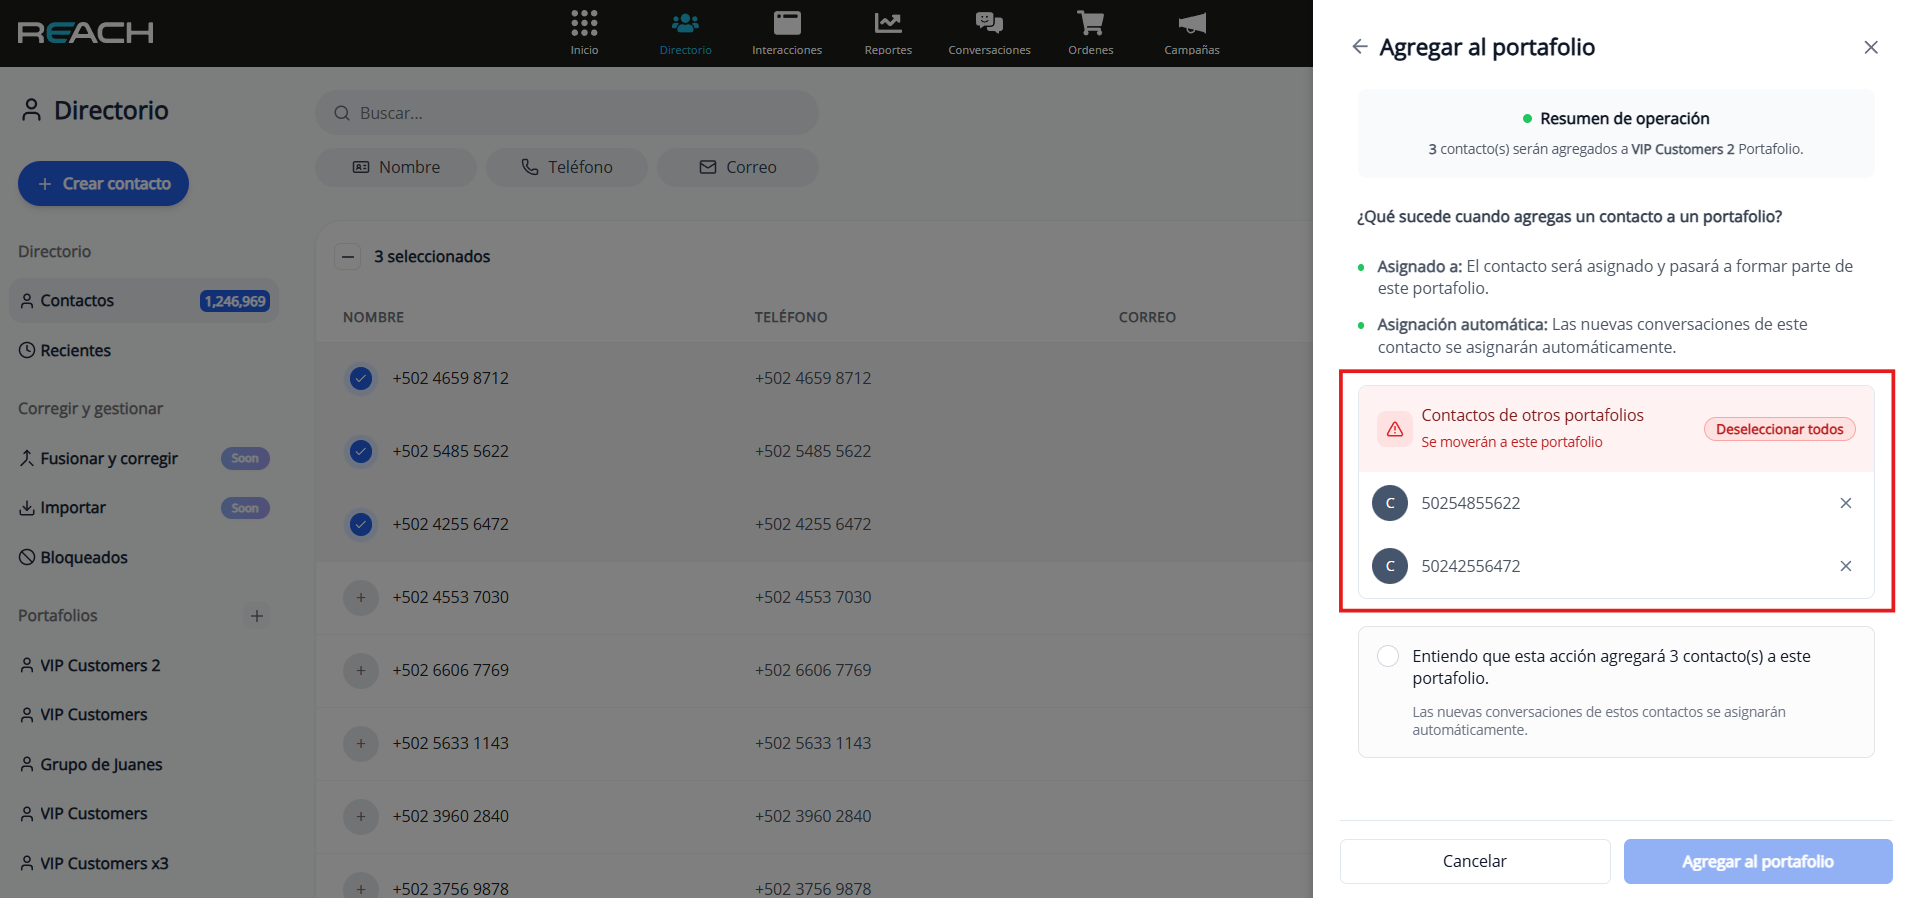
Contacts Already Assigned to Another Portfolio
If you try to assign a contact that already belongs to another portfolio:
- The system will display a warning.
- You will be able to identify which contacts are linked to other portfolios.
- You’ll have the option to move them to the new portfolio or keep them in the current one.
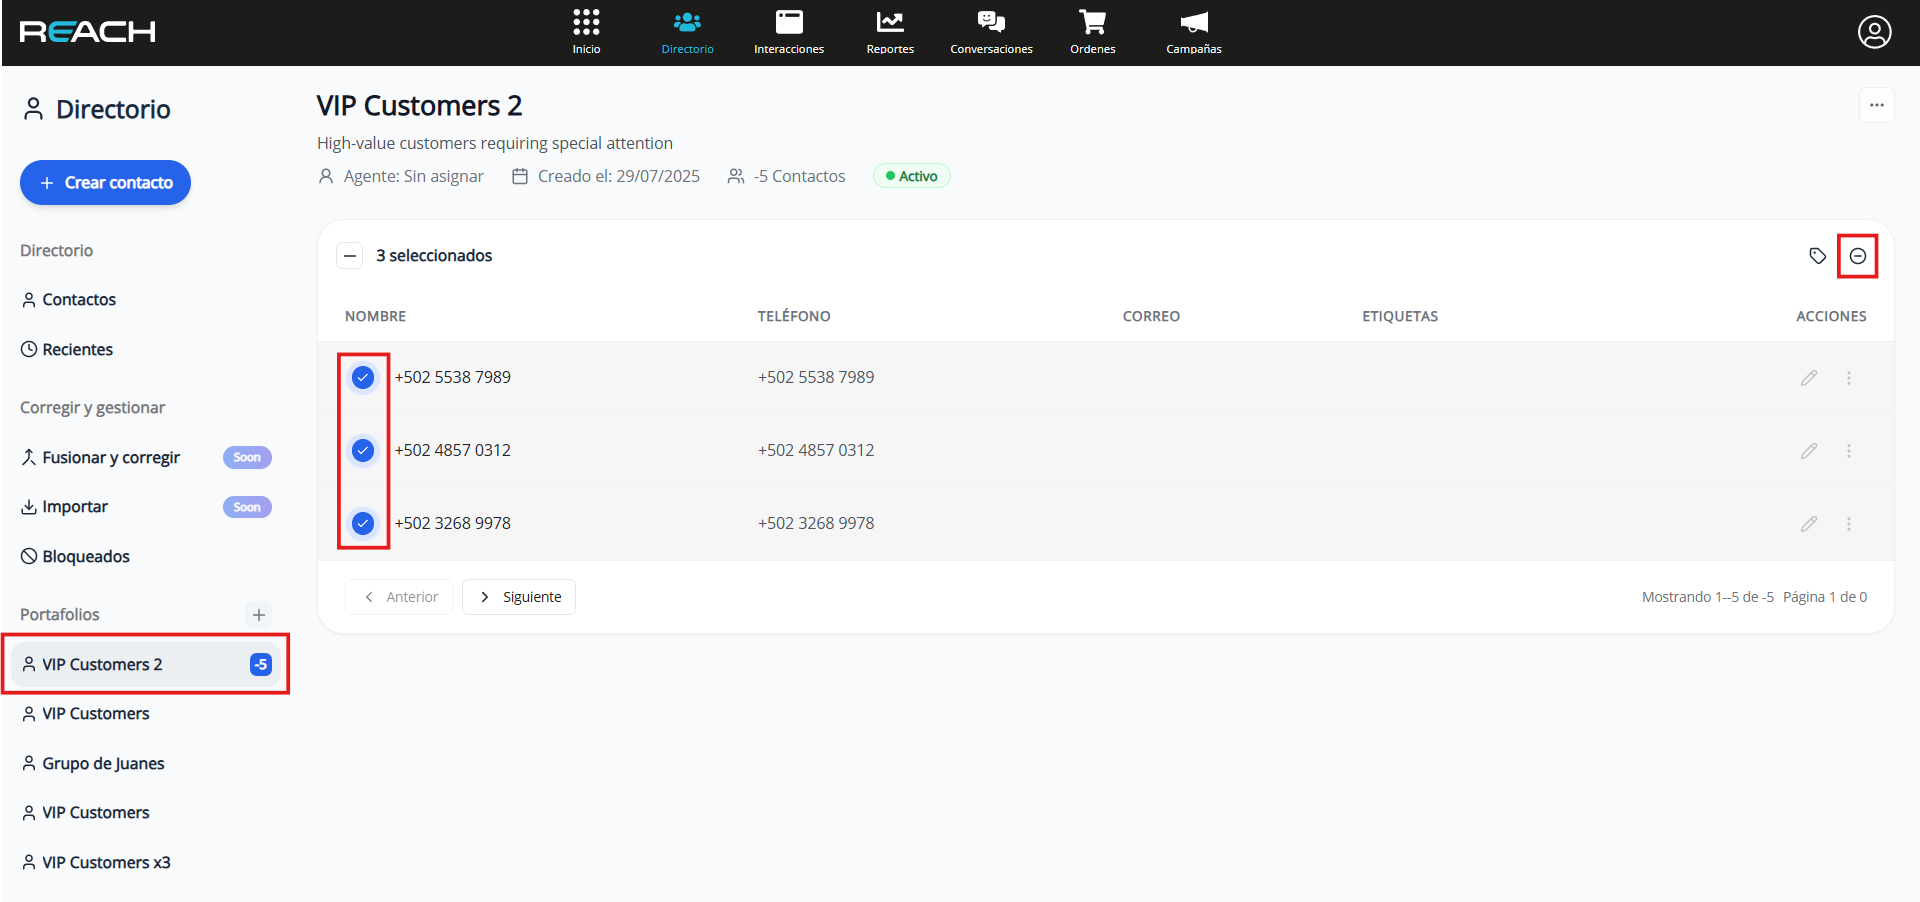
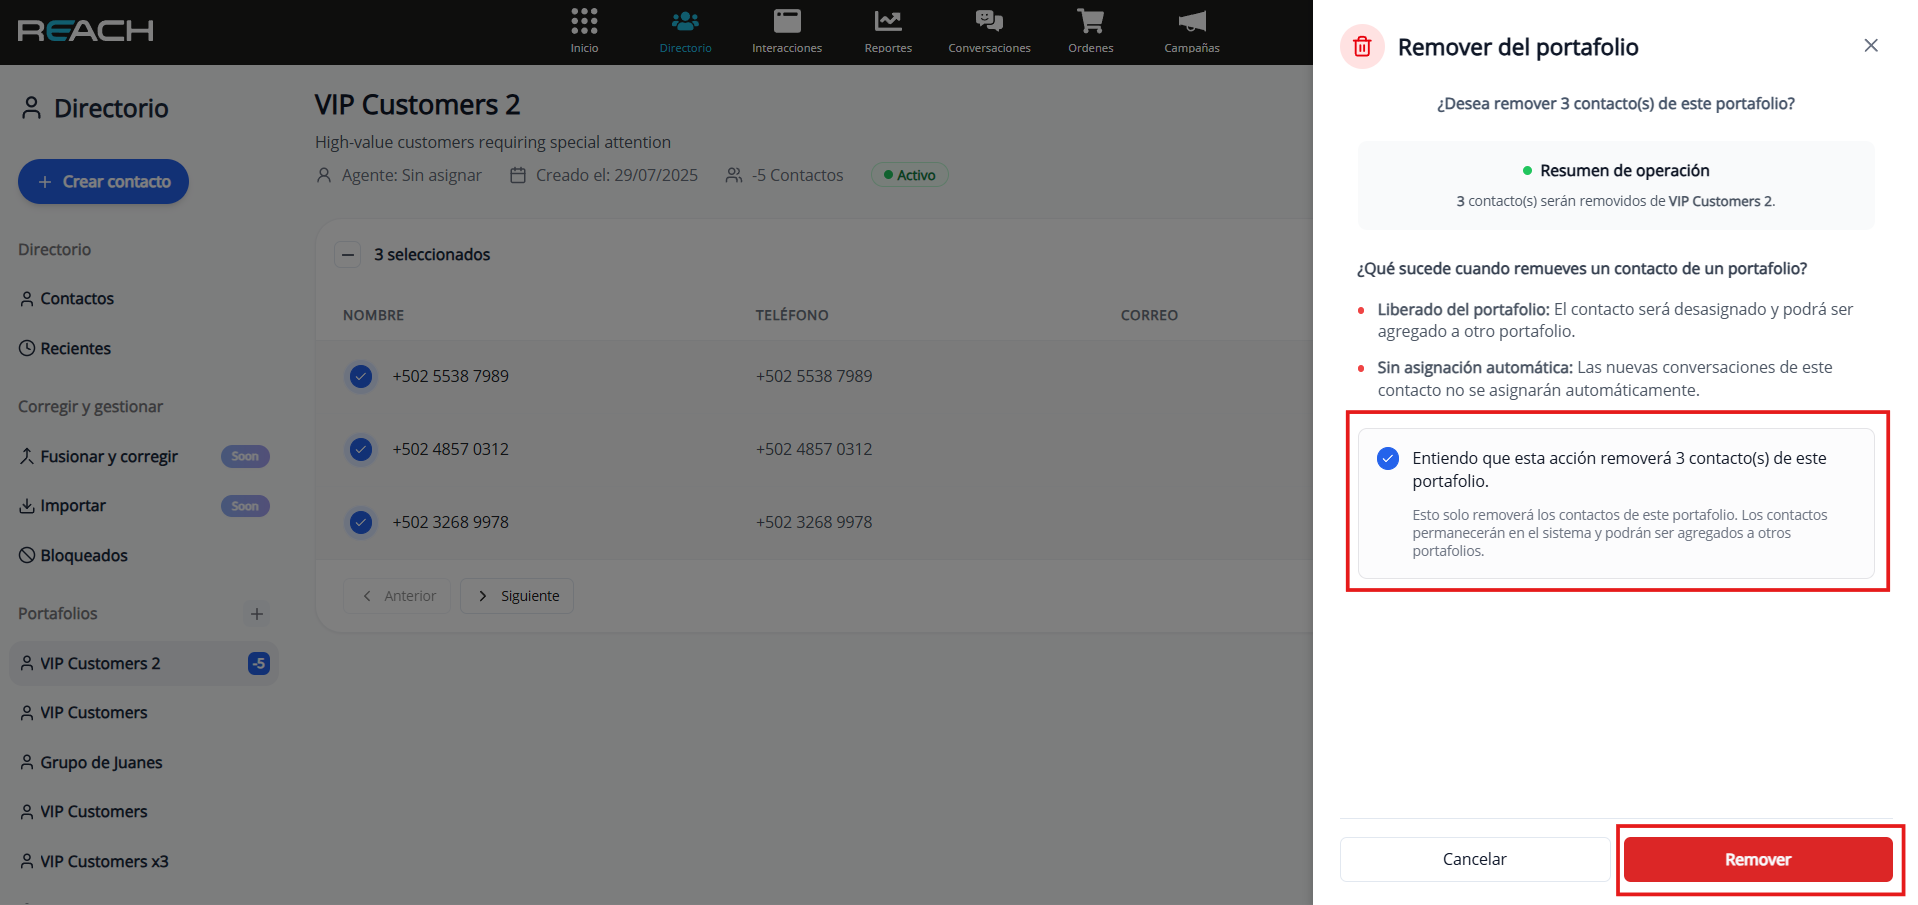
Remove Contacts from a Portfolio
Steps to remove:
- Go to the portfolio from the side menu.
- Select the contacts you want to remove.
- Click the “-” (Remove) button on the toolbar.
- Confirm the action.
Portfolio Status
- Active: available and visible for assignment and management.
- Inactive: disabled and does not appear in assignment options.
Permissions and Access
Administrator
- Views and manages all portfolios in the account.
- Can create, edit, and delete any portfolio.
- Can assign contacts to any portfolio.
Agent
- Views only the portfolios assigned to them.
- Can only edit their own portfolios.
- Assigns contacts exclusively within their portfolios.
Assignment Conflicts
Conflicts occur when you try to assign contacts that already belong to another portfolio.
How they are managed:
- Real-time verification: when selecting the destination portfolio, the system checks the status of each contact.
- Automatic comparison: validates whether the contact already has a portfolio assigned.
- Smart filtering: separates conflicting contacts from those that can be assigned without issue, allowing for immediate resolution.