Conversations Configuration
Settings
Integrations, payments and users remain exactly the same as they were not modified. The conversations section was modified as it was divided.
Conversations Configuration
Self-Service Menu
Utilize the “Self-Service Menu” option to streamline customer service and add actions that facilitate the resolution of frequently asked questions.
-
Within the “Conversations” menu, navigate to the top right and select the profile icon.
-
Select > “Account Settings”.
-
On the left side of the menu, select > “conversations” > “Self-Service Menu”.
-
Within the first available box, type the message with which you want to greet your business’s customers.
Example:
- “Hello {first_name}, Thank you for choosing us! It’s a pleasure to assist you. For your convenience, we have enabled the following options. Enter the number of your interest:
-
In the “Keywords” field:
- Choose the submenu that precedes the action. For example, if the menu you are configuring is “Welcome,” the top level should be “None” since there is no message preceding this action.
-
En el campo “Palabras clave”:
- Select any of the available options for your customer to respond to and trigger an action. It’s important to note that this is an additional word to the level number assigned by the platform. If you don’t want the menu to respond to any additional words, don’t add any tags. Example: “Hours”
-
In the “Option Name” field:
- Enter the name of the menu you are creating. Example: Business Hours
-
In the “Option Message” field:
-
Type the text your customer will receive when selecting the assigned option. Example:
Zone 10, Zone 11: Monday to Saturday 9:00AM to 6:00PM and Sunday 10:00AM to 6:00PM Zone 9: Monday to Saturday 10:00AM to 6:00PM and Sunday 10:00AM to 6:00PM.
-
-
In the “Assign to Group” field:
- Choose the group (from the existing user groups in your account) to which you want the conversation to be assigned. Example: When sending command 1, assign this conversation to an agent within the “Marketing” group
-
In the “Assign a Tag” field:
- Assign a specific tag when the selected command is received.
Use the buttons next to each menu for the following actions:

- Move the created menu option up and change the current order of options.
- Move the created menu option down and change the current order of options.
- Edit the information entered in the created menu/level.
- Create a menu/level exactly like the one selected one level below the current one.
- Delete the selected menu/level.
To create a new menu/level within your self-service menu, press the ”+” button at the bottom of your screen.
Service Hours
Service hours are essential for managing automatic responses when your account is out of service. In this section, you can customize your service hours and the message your customers will receive if they contact you outside these hours.
How to configure your service hours
- Within the “Conversations” menu, go to the top right corner and select the profile icon.
- In the dropdown menu, choose “Account Settings”.
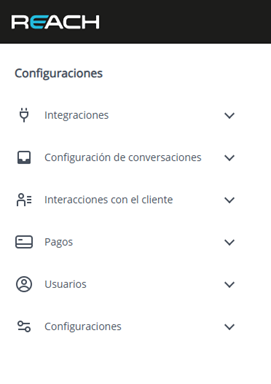
- In the “Settings” menu, located on the left side of the screen, select “Conversations Configuration”.
- Then, choose the “Service Hours” option.
- In this section, you can:
- Set your service hours by enabling or disabling days and adjusting available hours.
- Write an automatic response message for customers who contact you outside the established hours.
- If you want only the service hours to be active, you can disable the message. Otherwise, make sure the “Offline Message” option is enabled using the switch located at the top of the written message.
- Once you have configured all the information, click “Save” to apply the changes.

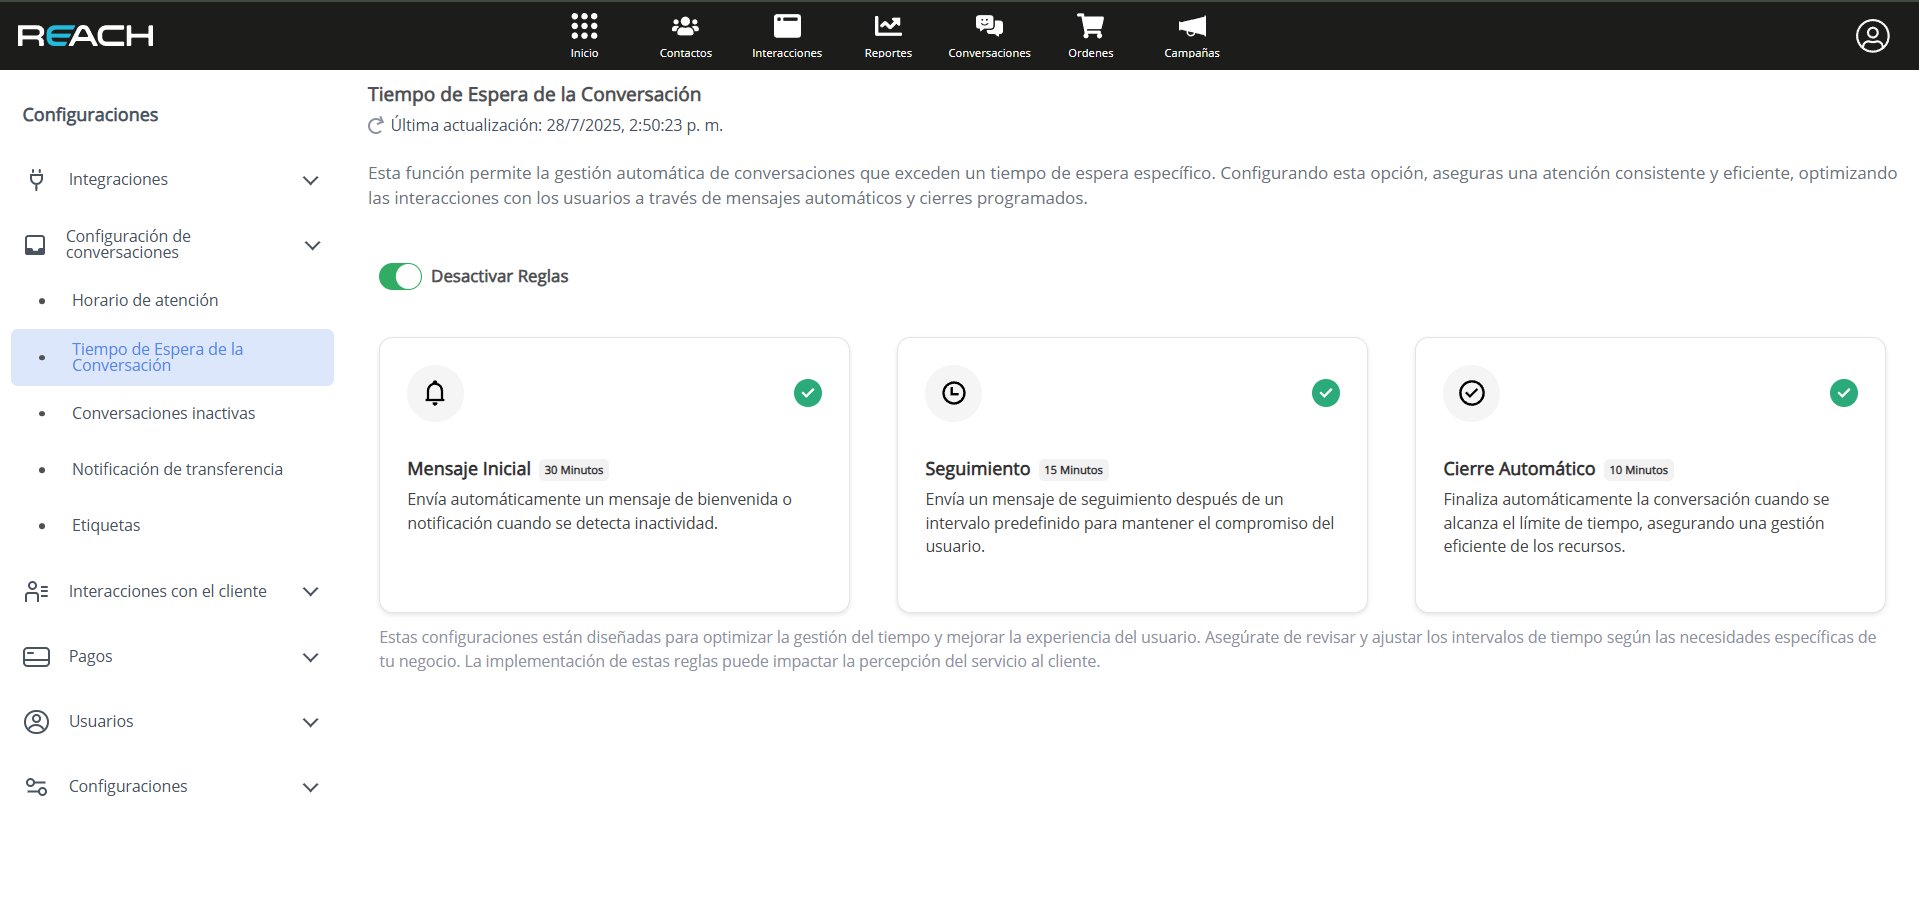
Conversation Wait Time
This function allows you to automatically manage conversations that exceed a specific wait time. When configured, it ensures consistent and efficient attention, optimizing user interactions through automatic messages and scheduled closures.
Follow-up Messages
You can configure three automatic messages as follow-up to conversations.
- Initial Message: It activates after a specific time (for example, 10 minutes) since the last interaction. Example message: “Are you still there? We noticed you haven’t responded to our messages.”
- Follow-up Message: It activates after a specific time, for example, 10 minutes after the initial message if the customer hasn’t responded. It allows maintaining user engagement.
- Automatic Closure: Notifies the customer that the conversation has been finalized if there’s no response after additional time.
Time Example
It’s important to consider that times are cumulative. For example:
- Initial Message: 10 minutes
- Follow-up Message: 15 minutes
- Automatic Closure: 20 minutes Total: 45 minutes.
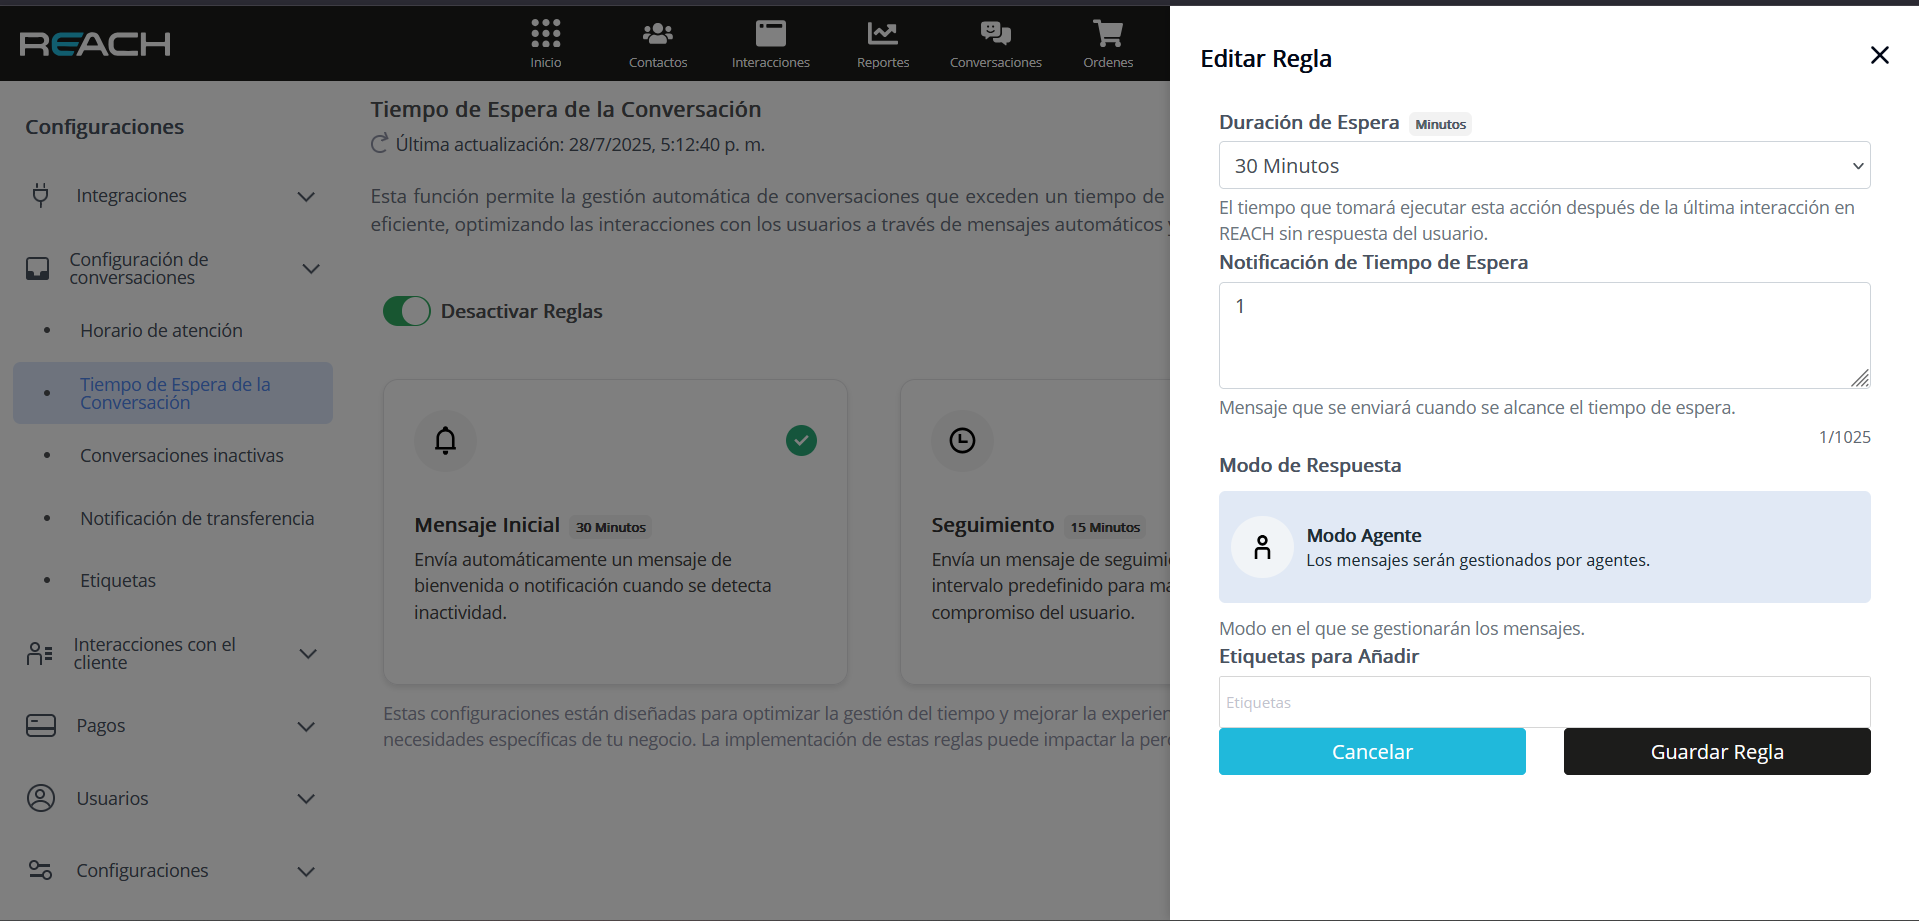
Steps to Configure Follow-up Messages
- Select Wait Time: Define the time that must elapse to activate the message (for example, 10 minutes).
- Wait Time Notification: Here you write the message you want to send to the customer.
- Response Mode: Select between:
- Agent
- Bot
- Menu
- Additional Tags: You can add a tag that is automatically placed with the follow-up message.
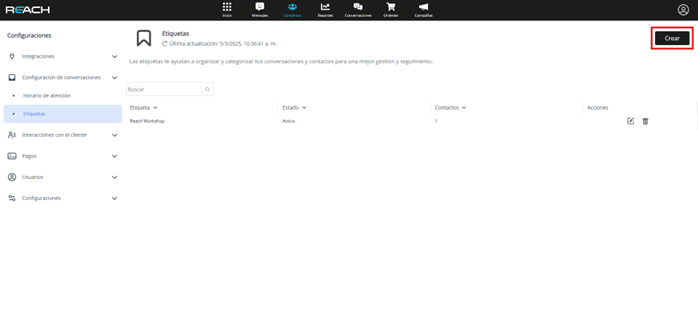
Tags
In this section, you can manage the tags created for conversations in Reach. You will have the option to create, edit, or delete them as needed.
How to manage tags:
- Within the “Conversations” menu, go to the top right corner and select the profile icon.
- In the dropdown menu, choose “Account Settings”.
- In the “Settings” section, located on the left side of the screen, select “Conversations Configuration”.
- Then, select “Tags”, where the tag manager screen will be displayed.
- Click the “Create” button and enter the name of the tag you want to add.
- To edit or delete a tag, use the options available on the right side of the tag list.
Example

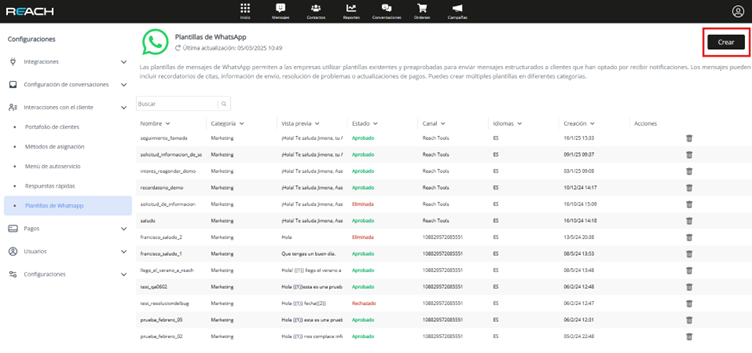
WhatsApp Templates
Within the Reach platform, account administrators have the exclusive ability to customize templates for WhatsApp Business. This feature simplifies the initiation of efficient conversations between agents and customers. Below are the detailed steps to create a WhatsApp template:
- From the “Conversations” menu, go to the top right corner of the screen and click on the profile icon.
- In the dropdown menu, select “Account Settings.”
- On the “Settings” screen, on the left side, choose “Client Interactions”
- Within the “Conversations” section, select “WhatsApp Template.”
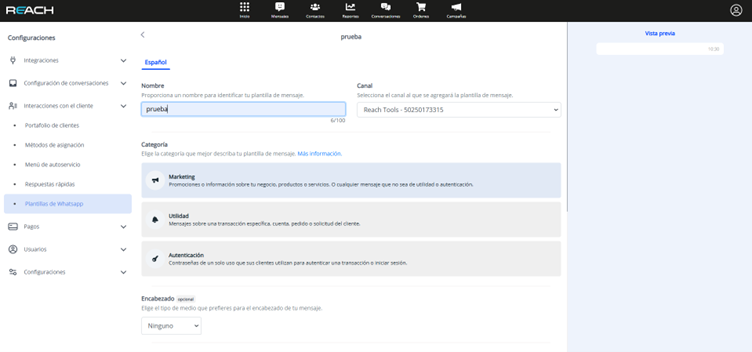
- Click on “Create template.”
- Assign a descriptive name to your template without special characters.
- Select the category that best fits the template’s purpose, we recommend the marketing category.
- If you want to include a header, choose the type of multimedia to use.
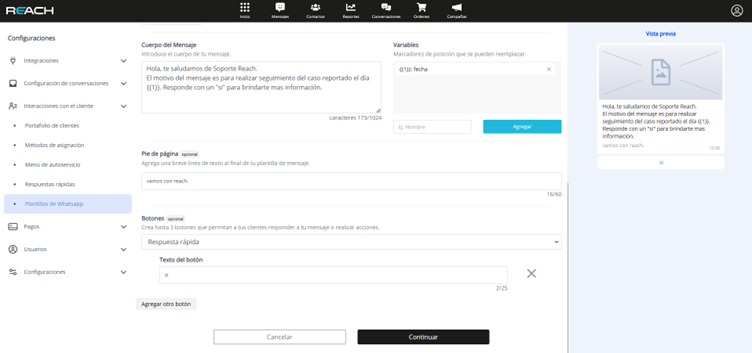
- Insert the message text, keeping in mind the possibility of adding variables to personalize the information, such as the customer’s name. We recommend leaving a space before and after placing variables to avoid formatting issues.
- Optionally, you can include action buttons, such as quick replies, calls, or links to web pages.
- Once you have entered all the necessary data, click on “Continue.”
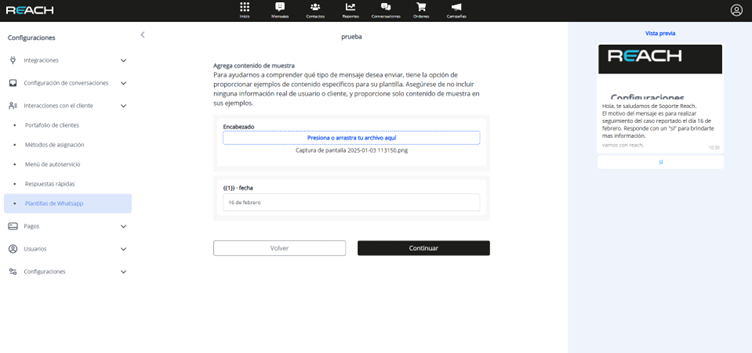
- On the next screen, add required examples. If the template includes files, provide examples of images, videos, or documents, keeping in mind that these are only examples.
- Finally, click on “Continue,” and your template will be created. It will be sent to Meta for approval.
IMPORTANT
- Keep in mind that templates usually take 24 to 48 hours to be approved by Meta. If the template is rejected, do not hesitate to contact the Reach support team for additional assistance.
- Avoid adding more than 1 space per paragraph or line, as this could cause Meta to reject your template.
- Most templates are usually classified in the marketing category.
- If the template is rejected and you want to try creating it again, avoid using the same name, as Meta will relate it to the previous one, causing it to be rejected again.
Campaigns
Campaigns allow you to send mass messages through WhatsApp using a file with your customers’ contacts. Customize your content and decide whether you want to send it immediately or schedule it for later.
How to create a WhatsApp campaign:
- In the “Conversations” menu, select the “Campaigns” submenu at the top of the screen.
- Click on “New campaign”.
- Enter a name in the “Name” field to identify your campaign.
- In the “Broadcast channel” option, select “WhatsApp”.
- Write the objective of your campaign in the “Objective” field.
- Select the template to send in the “Template” option.
- Note: You can only use templates previously approved by Meta Business for your account.
- If the template includes a multimedia header, disable the option “The multimedia content comes within the .csv file” to be able to attach the file from this section.
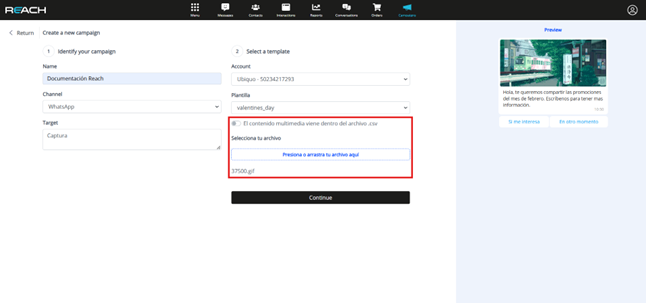
- Download the contacts template and add the phone numbers of the customers you want to send the campaign to.
- Once the file is edited, upload it to the platform by selecting “Press or drag file here” and click on “Continue”.
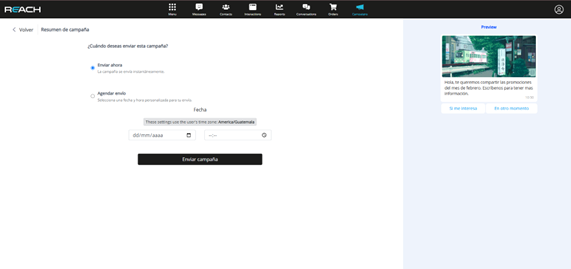
- Verify the file data and select “Send campaign”.
- Configure the sending:
- You can send it immediately or
- Schedule it for later.
IMPORTANT
If you decide to schedule the campaign, make sure to do it with at least 1 hour in advance to avoid processing delays. Do not schedule sends with less than 5 minutes margin, as the tool requires time to execute the campaign correctly.