Reach Storefront
Reach Storefront is a strategic module designed for centralized, efficient, and scalable administration of multiple digital stores within the Reach platform. Its purpose is to enable comprehensive management of catalogs, collections, and products, as well as their synchronization with master catalogs to enable assisted sales functions within the Inbox.
The tool organizes the catalog structure through stores, collections, and products; facilitates variant creation, allows real-time previews, and ensures that the information displayed to customers is consistent and high-quality. This module is aimed at businesses that require maintaining one or multiple organized catalogs, managing inventories, and offering optimized conversational commerce experiences.
Step-by-step instructions
1. Create a store
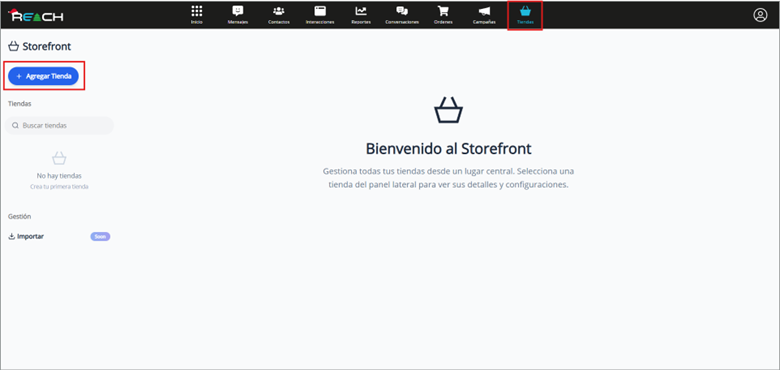
- In the top bar, select Storefront.
- Select the Add store button.
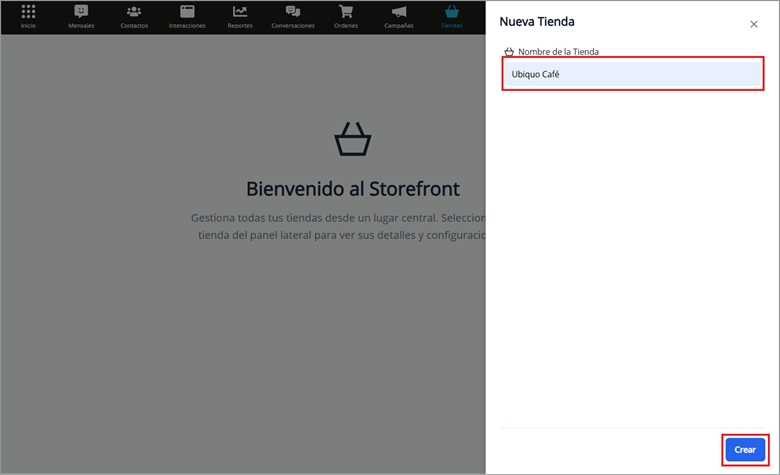
- Enter the store name.
- Click Create to finish.
Stores organize collections and products, allowing catalogs to be separated by campaigns, branches, or business lines.
2. Edit or delete a store
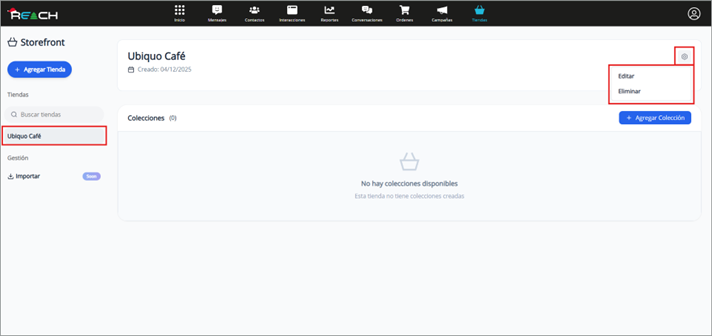
- Select the desired store from the side panel.
- In the store header, select the settings icon.
- Choose Edit or Delete, as appropriate.
Edit: update the name and select Edit.
Delete: confirm the warning and select Delete.
3. Create a collection
- Within the selected store, click add collection.
- Complete the required fields.
- Select Create to finish.
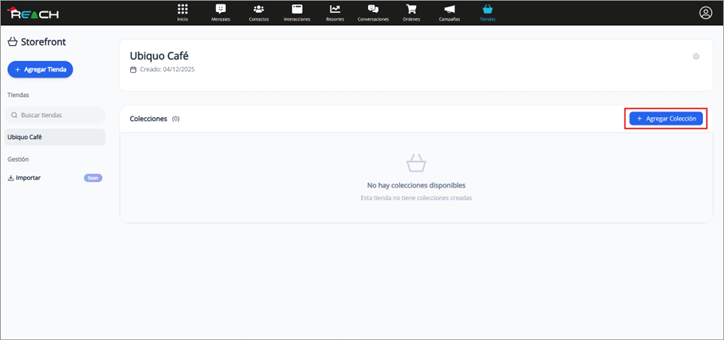
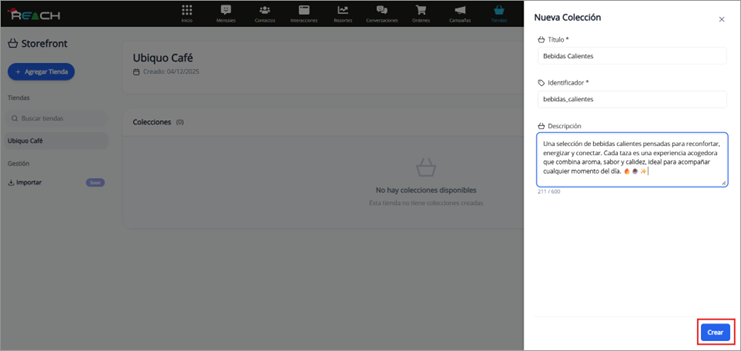
Collections function as categories to organize products.
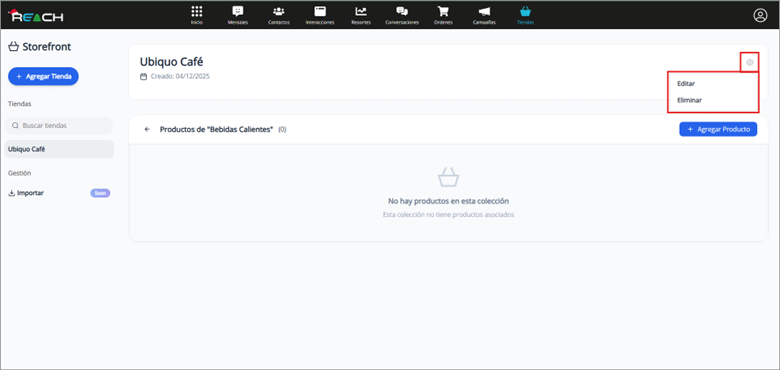
5. Edit or delete a collection
- Select the collection.
- Use the Edit button to modify fields and then Save.
- To delete, select Delete and confirm the action.
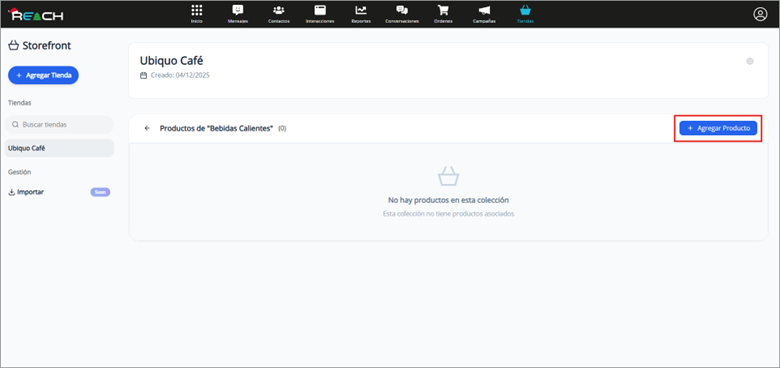
6. Create a product
- Select a collection.
- Click add product.
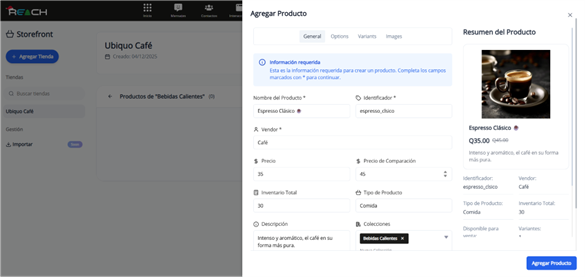
- Complete the four sections of the form:
a. General
- Basic product information.
- All fields must be completed except Total Inventory and Compare at price.
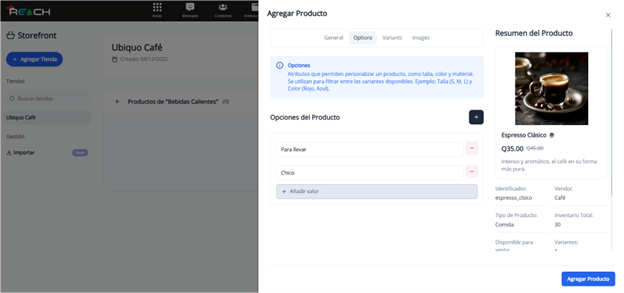
b. Options
- Configure attributes such as size, color, or material.
- The number of options depends on the store configuration.
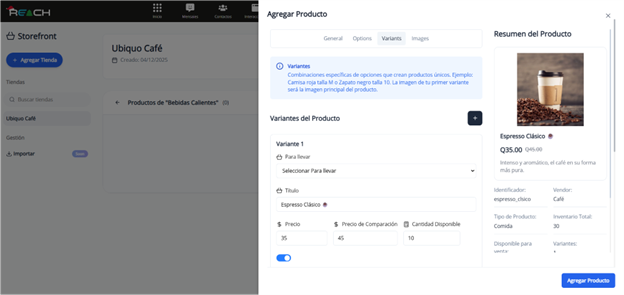
c. Variants
- Combine the options to create individual product variants.
- You can add up to 3 images per variant, the first will be the main image.
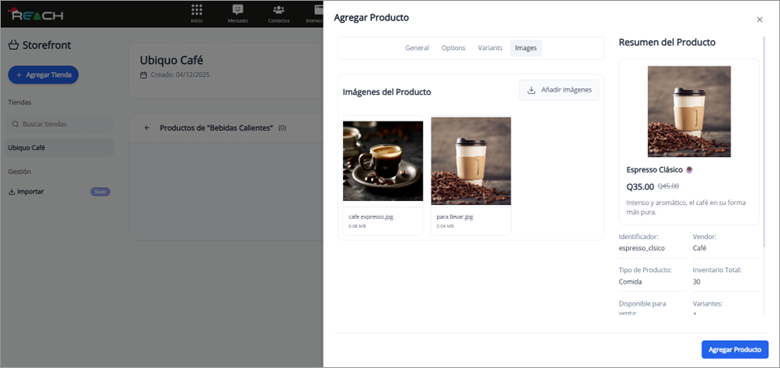
d. Images
- Add up to 5 additional images to display the product.
The right panel will show a real-time preview while you complete the form.
Best practices
- Maintain a clear structure between stores, collections, and products to optimize navigation.
- Use consistent and descriptive names for products and variants.
- Verify images within the live preview to ensure visual quality.
- Leverage collections to segment campaigns, seasons, or business lines.
- Keep your master catalog synchronized to avoid inconsistencies in products displayed in Inbox.
Known limitations
According to the documentation:
- Limit of 5 stores per account.
- Maximum of 10 collections per store.
- Up to 10 products per collection.
- Each product should be kept simple: maximum 2 variants and 2 images per product (this restriction applies to the model described in the file).
Note: In the product creation section, a different limit appears (up to 3 images per variant and 5 global images). It is recommended to validate with support if these restrictions vary by plan or configuration.
Additional observations
- Catalog synchronization with Reach is continuous and automatic, ensuring that Inbox always displays up-to-date information to agents.
- Storefront facilitates conversational sales by offering product cards, prices, and details in real-time.
- Proper catalog structuring improves operational performance and can increase conversion rates.